
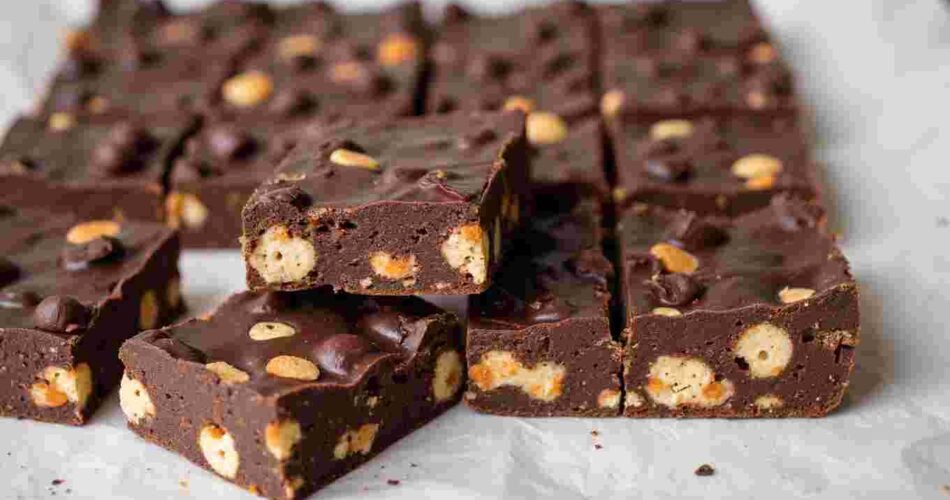

Chocolate Crunch is one of those recipes that’s both simple and a total crowd-pleaser. It’s basically a no-bake treat that combines rich dark chocolate with crunchy biscuits and cornflakes—giving you a perfect mix of smooth and crispy textures. From my experience, melting the chocolate gently with butter over low heat is key; it stops the mixture from burning and keeps everything silky. Crushing the digestive biscuits just right so they’re chunky, not powdery, adds that lovely bite. This recipe takes minimal time to prepare but needs a good chill to set properly. Trust me on this one—it’s a game-changer for easy, impressive homemade sweets!
Key Takeaways:
- Prep Time: 10 minutes
- Cook Time: 10 minutes
- Total Time: 2 hours 20 minutes
- Servings/Yield: 12 servings
- Difficulty Level: Easy
- Dietary Tags: Vegetarian
- Category Tags: Dessert
📝 Recipe Key Info
Here’s everything you need to know before you get started on this delicious Chocolate Crunch — a real crowd-pleaser that’s quick to whip up and perfect for sharing. The prep time is just 10 minutes, which means you’ll be handling straightforward, quick steps like melting chocolate and crushing biscuits. The cook time also clocks in at about 10 minutes, mainly for gently melting the dark chocolate and butter together to get that silky smooth base.
Now, the trick to this recipe’s magic is the chill time — you’ll want to pop it in the fridge for at least 2 hours. This is what really helps the mixture set firmly so you can cut perfect squares without a sticky mess. Altogether, you’re looking at roughly 2 hours and 20 minutes from start to finish.
This recipe serves 12, so it’s just right for a family dessert or a little gathering with friends. It’s labelled as easy to make, making it a brilliant choice even if you’re just starting out or short on time. Plus, it’s vegetarian-friendly, so it fits nicely into many diets, and it falls under the dessert category — because who says you can’t treat yourself?
A quick heads-up: store your Chocolate Crunch in an airtight container, and it’ll stay fresh for up to a week. Trust me, keeping it that way takes it to the next level every time you want a quick, sweet bite!
🥣 Ingredient List
Here’s everything you’ll need to make the delicious Chocolate Crunch that’s sure to become a go-to treat. I’ve organised the ingredients by the steps you’ll use them in, so it’s easy to follow along while you cook. All measurements are given in both grams and cups/ounces to keep things flexible for your kitchen tools.
Ingredients for Melting and Mixing
- 200g (7 oz) dark chocolate — Choose good-quality chocolate with at least 70% cocoa for the best flavour and meltability.
- 100g (7 tbsp) unsalted butter — This helps the chocolate melt smoothly and adds a lovely richness.
- 150g (1½ cups) digestive biscuits — Crush into small pieces but not too fine, so you get a nice crunchy bite.
- 100g (3½ cups) cornflakes — Adds that perfect crispy texture which makes this recipe stand out.
- 50g (¼ cup) granulated sugar — Just enough sweetness to balance the dark chocolate without overpowering the crunch.
- 1 tsp pure vanilla extract — A little vanilla goes a long way in rounding off the flavours.
Ingredient Notes and Substitutions
- Butter: Unsalted is best here because it lets you control the saltiness. For a vegan option, swap for dairy-free margarine; ensure it melts well.
- Digestive Biscuits: Gluten-free biscuits like oat-based cookies work for gluten-free diets. Avoid soft or crumbly biscuits to maintain crunch.
- Cornflakes: Ideal for nut-free versions. Puffed rice cereal is a good alternative for a different crisp texture.
- Dark chocolate: High-quality dark chocolate lifts flavour. Milk chocolate is sweeter but milder in taste.
- Sugar: Substitute white sugar with packed brown sugar for a deeper caramel-like sweetness.
Now, here’s the fun part — after gathering these simple, everyday ingredients, you’re ready to move on to melting, mixing, and creating your own batch of Chocolate Crunch. Having your ingredients ready and well-understood makes the process smoother and more enjoyable.
👩🍳 3. Step-by-Step Instructions with Pro Tips
Making Chocolate Crunch is easier than you might think. I’ll walk you through every step with handy tips to get it just right. This recipe takes about 10 minutes to prep, 10 minutes to cook, and then a couple of hours to chill — the wait is worth it!
1. Melt the chocolate and butter gently
Start by melting 200g of dark chocolate and 100g of butter together in a pan over low heat. This slow melt avoids burnt chocolate, which spoils the taste.
Pro Tip: Stir constantly with a spatula to keep the mixture smooth and prevent sticking or burning. Using a double boiler helps maintain a safe temperature.

2. Crush the digestive biscuits just enough
Take your 150g of digestive biscuits and crush them so you have small chunks instead of a fine powder. You want texture here — those little biscuit pieces give the crunch we’re after.
Chef’s Note: Put biscuits in a plastic bag and gently bash with a rolling pin. Don’t overdo it to keep the crunch.
3. Mix in the biscuits and cornflakes
Add the biscuit chunks and 100g of cornflakes into the melted chocolate and butter. Stir so the biscuit and cornflakes are coated evenly in chocolate.
Pro Tip: Use a big enough bowl, as it gets messy! Combine well but do not overmix to preserve crunch.
4. Sweeten with sugar and vanilla
Stir in 50g of sugar and 1 teaspoon of vanilla extract. This combo brightens flavour and balances rich chocolate.
Chef’s Note: Use caster sugar for faster dissolving; stir extra if granules remain.
5. Set it in the tin
Pour mixture into a lined square baking tin (around 20x20cm). Press mixture down firmly and level it.
Pro Tip: Press firmly but gently to compact without crushing the cornflakes fully.
6. Chill until set
Place tin in fridge to chill at least 2 hours. This hardens chocolate and binds ingredients together.
Pro Tip: Avoid freezing; too cold can dull texture and appearance.
7. Cut and enjoy!
Lift slab using lining and cut into 12 squares – perfect for sharing with tea.
Chef’s Note: Use a sharp knife dipped in hot water for smooth cuts without cracks.
Store leftovers in an airtight container; they keep fresh up to one week. Following these steps ensures a crunchy, delicious treat every time plus tips to avoid common mistakes. Enjoy!
🍫 Recipe Variations & Serving Suggestions
Customize your Chocolate Crunch by swapping half the dark chocolate for milk chocolate to add creaminess and sweetness. For nutty crunch, add chopped hazelnuts or almonds when mixing biscuits and cornflakes. Tropical fans can mix in shredded coconut or dried mango pieces for extra flair without losing chocolatey goodness.
To reduce sugar, cut it back or replace with natural sweeteners like honey or maple syrup. Note this may soften texture, so watch chilling time. For a minty touch, add peppermint extract drops with vanilla for after-dinner freshness.
Serve with whipped cream or vanilla ice cream for a treat. A drizzle of salted caramel or fresh berries adds grown-up elegance, ideal for guests or cozy nights.
Store leftovers in airtight containers at room temperature up to one week. Refrigerate on warm days to prevent melting. No reheating needed; bring to room temp for 10 minutes to soften before serving. These tips keep Chocolate Crunch tasting fresh and fabulous.
💡 Why This Recipe Works
The secret to reliably delicious Chocolate Crunch is melting dark chocolate and butter over low heat slowly. This keeps the mixture glossy, smooth, and prevents graininess or seizing.
Digestive biscuits and cornflakes provide the satisfying crunchy texture. Crushing biscuits just enough preserves chunks, and mixing with crisp cornflakes balances smoothness and crunch superbly.
Sugar and vanilla extract awaken and brighten the chocolate’s deep flavour. Pressing the mixture firmly helps it hold together and set well in the fridge, so you get perfect squares, not a sticky mess.
These simple precision steps create a dessert that’s both tasty and wonderfully dependable.
❓ 6. Frequently Asked Questions (FAQ)
Can I make Chocolate Crunch ahead of time?
Yes, this treat tastes even better after resting one or two days in an airtight container in the fridge. Keeps well for up to a week.
Can I freeze Chocolate Crunch?
Absolutely. Wrap squares tightly in cling film, place in a freezer bag, and thaw overnight in the fridge. Texture remains crunchy.
What if I don’t have digestive biscuits?
Substitute with graham crackers, rich tea biscuits, or crushed ginger nuts for a twist. Avoid soft or cakey biscuits to maintain crunch.
My Chocolate Crunch is too soft or crumbly. Why?
Make sure chocolate and butter are fully melted and combined before adding biscuits and cornflakes. Also press mixture firmly into the tin for a solid set.
How to vary flavor?
Add chopped nuts or sprinkle sea salt on top before chilling to elevate taste.
🎉 Conclusion
This Chocolate Crunch recipe is a quick, no-fuss treat that feels special. A few simple ingredients like dark chocolate, crunchy cornflakes, and buttery digestive biscuits combine in minutes and chill into a rich, crunchy slice. Pressing the mix and chilling sets the stage for an impressive homemade snack perfect for sharing. Store in airtight containers easily and enjoy whenever you need a sweet pick-me-up. Give it a try—you won’t regret it!