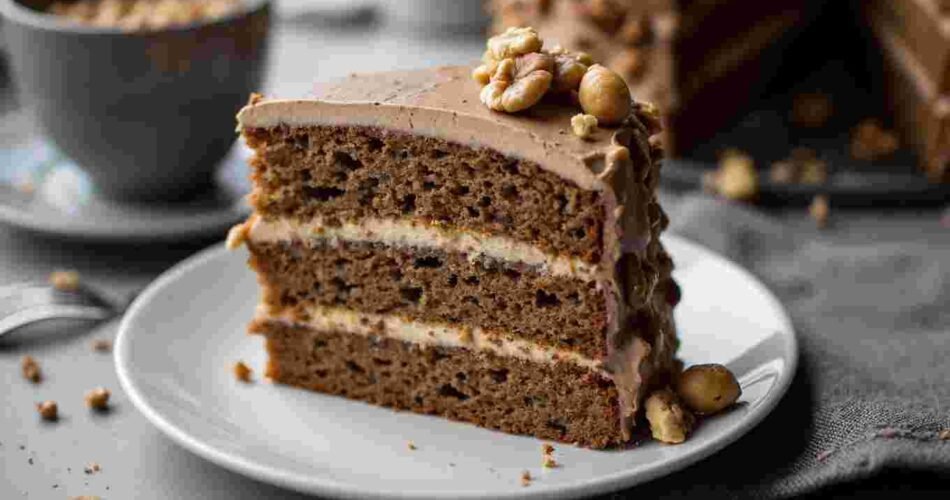

A Coffee and Walnut Sponge Cake is a classic treat that effortlessly blends rich coffee flavour with the crunch of toasted walnuts. If you’ve ever wondered how to get that perfect, moist texture with an even rise, this recipe is a game-changer. Using self-raising flour simplifies the baking process while dissolving instant coffee granules in hot water helps spread that aroma and taste evenly through the sponge. Trust me on this one: beating in the eggs with a bit of flour prevents the batter from curdling, keeping it smooth and light. Whether for a cosy afternoon or special occasion, this cake takes it to the next level.
Key Takeaways:
- Prep Time: 15 minutes
- Cook Time: 25–30 minutes
- Total Time: 40–45 minutes
- Servings/Yield: One two-layered cake (20cm diameter)
- Difficulty Level: Intermediate
- Dietary Tags: Vegetarian, Nutty, Contains Dairy & Eggs
- Category Tags: Tea Time, Special Occasion, Dessert
Recipe Key Info ☕
Here’s everything you need to know about making this delicious Coffee and Walnut Sponge Cake — a real crowd-pleaser that’s perfect for teatime or special occasions. This recipe yields one two-layered cake, about 20cm in diameter, so it’s just the right size to share but won’t leave piles of leftovers.
You’ll start with simple, easy-to-find ingredients like unsalted butter, caster sugar, and self-raising flour, alongside four eggs for that light sponge texture. The instant coffee granules give it a lovely, subtle kick without being overpowering. Dissolving them in hot water first really helps spread that coffee flavour evenly through the batter — a game-changer for the taste. And those chopped walnuts add a satisfying crunch; just make sure they’re fresh for the best flavour.
Remember to preheat your oven to 180°C and prepare your tins properly by greasing and lining them. This helps your cakes come out cleanly without sticking, saving you stress later. When you mix in the eggs, adding a bit of flour with each one avoids the mix curdling — a handy little trick to keep the sponge smooth and fluffy.
While the cakes bake for about 25–30 minutes, you can whip up the buttery coffee liqueur buttercream. Adding a splash of strong coffee to the icing sugar and butter makes it extra luscious and ties the whole flavour together beautifully. Trust me, sandwiching those layers with this buttercream takes the cake to the next level.
Ingredient List 📝
Here’s everything you’ll need for a classic Coffee and Walnut Sponge Cake that’s moist, flavourful, and sure to impress. Organising the ingredients by the recipe steps makes it easy to follow along and keeps your kitchen prep smooth.
For the Sponge Cake:
- 225g (8oz) unsalted butter, softened — room temperature butter creams up better, giving you that lovely light texture.
- 225g (8oz) caster sugar — fine sugar that blends well without leaving a grainy feel.
- 4 large eggs — bring them to room temperature so they mix in evenly and help the batter rise nicely.
- 225g (8oz) self-raising flour — this already includes a raising agent, so no need to add baking powder separately.
- 2 tsp instant coffee granules, dissolved in 1 tbsp hot water — dissolving the granules first helps spread the coffee flavour evenly without any gritty bits.
- 100g (3.5oz) chopped walnuts — give them a rough chop for texture and toasty flavour.
For the Filling and Decoration:
- 2 tbsp coffee liqueur (optional) — adds depth to the buttercream but feel free to skip if you prefer no alcohol.
This ingredient list is tried and tested to balance moisture, flavour, and crumb. If you’re after a nut-free option, you could swap walnuts for chopped hazelnuts or even toasted pecans, but walnuts give that signature bite here.
Trust me on dissolving the coffee granules first — it really takes the cake’s flavour to the next level. And when creaming butter and sugar, patience is key; a good long mix traps air, giving you a fluffy sponge that will rise beautifully.
Keep these ingredients at the ready before you start baking. Having everything measured and prepared means your time in the kitchen flows effortlessly, making it more fun and less stressful. Now you’re all set — the next step is where the magic really begins!

Step-by-Step Instructions with Pro Tips 🥄
Making the perfect Coffee and Walnut Sponge Cake isn’t as tricky as it sounds. Let’s break it down clearly so you can enjoy every step and get that delicious result. Grab your apron, and we’ll take it one step at a time.
1. Get Your Oven Ready
First, preheat your oven to 180°C (350°F). It’s important to have the oven hot and ready before your mixture goes in—this ensures a good rise and even baking. Grease your two 20cm round cake tins and line them with baking paper to prevent sticking.
Pro Tip: Use baking paper to line both the base and sides of the tins. This stops the cake from clinging awkwardly and helps you get neat, smooth edges.
2. Cream Butter and Sugar Until Fluffy
Take your 225g unsalted butter and 225g caster sugar. Beat them together until the mixture turns pale and fluffy. This step is a game-changer because you’re incorporating air that will give your sponge a lovely light texture.
Chef’s Note: Use room temperature butter to make creaming easier. If it’s too cold, it won’t blend properly, and if it’s too soft, you might lose that airy effect.
3. Adding Eggs Carefully
Beat in four eggs, one at a time. Here’s the trick: with each egg, add a tablespoon of the 225g self-raising flour before mixing it in. This helps prevent the mixture from curdling or splitting, which can happen if eggs go in too fast.
Pro Tip: If your mixture starts to look a bit curdled, don’t worry—just beat it gently and add the flour as you go. That extra bit of flour helps keep everything stable.
4. Folding in the Remaining Ingredients
Now, gently fold in the rest of the flour, the coffee solution (2 tsp instant coffee granules dissolved in 1 tbsp hot water), and 100g chopped walnuts. Folding means using a spatula to lift and turn the mixture carefully, instead of stirring vigorously. You want to keep the air bubbles in there—this keeps the sponge nice and light.
Chef’s Note: Be gentle but thorough. Over-mixing will make the cake dense, while under-mixing leaves pockets of flour.
5. Baking to Perfection
Divide your batter evenly between the two tins. Pop them in the oven for 25–30 minutes. Check with a skewer by poking it into the centre; if it comes out clean, you’re good to go.
Pro Tip: Don’t open the oven in the first 20 minutes—opening the door can cause the cake to sink.
6. Cooling and Preparing the Filling
Let the cakes cool in the tins for 10 minutes; this helps them set well. Then, turn them out onto a wire rack and cool completely. While waiting, whip up the filling by mixing butter, icing sugar, coffee liqueur (optional), and a splash of strong coffee until smooth and spreadable—this coffee buttercream really takes the cake to the next level!
7. Assembling Your Cake
Finally, sandwich the two cakes with the coffee buttercream, spreading evenly. For a classic touch, decorate the top with walnut halves.
Pro Tip: Press the walnuts in gently so they stick but don’t break the cake.
Following these steps carefully will make sure your Coffee and Walnut Sponge Cake is a real winner every time—enjoy the process and the lovely results!
Recipe Variations & Serving Suggestions 🍰
Now, here’s the fun part—adding your own twist to the Coffee and Walnut Sponge Cake. If you want to amp up that coffee flavour, try swapping the instant coffee granules for finely ground espresso or adding a splash more coffee liqueur. It’s a game-changer that really takes it to the next level. If you prefer a nut-free version, just leave out the walnuts and replace them with chocolate chips or dried cranberries for a different texture without losing that lovely sweetness.
For a lighter twist, try folding in some finely grated orange zest with the coffee mixture—it adds a fresh, zingy contrast that works surprisingly well. If you’re feeling fancy, swap the buttercream for whipped cream lightly flavoured with coffee, especially on a warmer day. It keeps things airy and balances the rich sponge beautifully.
Serving your cake? Cut it into neat slices, and serve alongside a scoop of vanilla ice cream or a dollop of crème fraîche. Leftovers store brilliantly—wrap the cake tightly in cling film and pop it in an airtight container in the fridge for up to three days. When you fancy a treat later, let it come to room temperature or warm it slightly for that just-baked feel again. Trust me on this one, these tips make all the difference!
Why This Recipe Works ✔️
This Coffee and Walnut Sponge Cake is a real crowd-pleaser, and here’s why it hits the mark every time. First off, creaming the butter and sugar until light and fluffy is a game-changer—it traps air in the mix, which gives the sponge that lovely rise and soft crumb. When you beat in the eggs, adding a little flour with each one isn’t just a random tip; it stops the mixture from curdling, keeping the texture smooth and consistent.
Dissolving the coffee granules in hot water rather than adding them dry means the flavour spreads evenly without any graininess. The chopped walnuts add not just crunch but a toasty depth that balances the coffee’s bitterness perfectly. If you include coffee liqueur, it takes the sponge to the next level with a subtle boozy warmth—though it’s just as stunning without it. Trust me on this one: these little details bring out the best in your bake every time.
Frequently Asked Questions (FAQ) ❓
Can I make this cake ahead of time?
Absolutely! This cake actually tastes even better when given a bit of time for the flavours to meld. You can bake the sponge and make the buttercream a day ahead, then assemble the cake on the day you want to serve it. Just wrap the cake layers tightly in cling film to keep them moist.
Can I freeze the cake or leftovers?
Yes, you can freeze the sponge once cooled. Wrap each layer well in cling film and foil, then pop it in the freezer for up to a month. When you want to enjoy it, defrost in the fridge overnight before adding your coffee buttercream.
What if I don’t have coffee liqueur?
No worries if you don’t have coffee liqueur on hand — it’s an optional touch for extra flavour. You can simply leave it out or replace it with a bit more strong brewed coffee. It won’t change the texture, just the depth of the coffee taste.
How can I avoid the cake curdling when adding eggs?
This is a key trick: adding a tablespoon of flour with each egg helps keep the mixture stable. It’s a game-changer if you ever struggled with curdling before. Be gentle when folding in the flour and coffee mixture to keep your sponge light and fluffy.
Can I substitute walnuts?
If you’re not a fan of walnuts or have allergies, try pecans or hazelnuts instead. They’ll still give you that lovely crunch and nutty flavour that takes this cake to the next level.
What’s the best way to tell when the cake is done?
The classic skewer test works wonders here — stick a thin skewer into the centre of the cake. If it comes out clean or with just a few crumbs clinging, your cake’s perfectly baked and ready to cool.
Trust me on these tips — they’re what help this coffee and walnut sponge turn out delicious every time. Feel free to keep these handy as you bake!
Conclusion 🎉
This Coffee and Walnut Sponge Cake is a proper showstopper that’s well worth the effort. The blend of rich coffee flavour and crunchy walnuts takes it to the next level, making each bite a real treat. Chilling your buttercream before spreading helps it hold its shape, so you get beautiful, even layers. Remember, beating in the eggs one at a time with a little flour stops the mix from curdling—trust me, it’s a game-changer for that perfect sponge texture. Whether it’s a teatime indulgence or a special occasion, this cake promises both flavour and a lovely homemade feel you’ll want to share.